Fix a Short Circuit on a Motorcycle/Scooter—we’ve all been there!
It’s one of the most frustrating motorcycle electrical problems riders face—flickering lights, dead batteries, and sudden stalls.
Flickering lights, a drained battery, sudden stalling—it’s frustrating, to say the least. But you’re not alone; this is a common issue that motorcycle and scooter riders face.
Whether it’s a frayed wire, a blown fuse, or a faulty connection in the wiring harness, knowing how to spot and fix it can save you both time and money.
And here’s the good news: with a few basic tools, some simple steps, and a little patience, you can handle this repair on your own.
In this guide, we’ll walk through the process of diagnosing, troubleshooting, and safely fixing a short circuit.
Let’s dive in and get your ride back on the road, running smoothly!
What Causes a Short Circuit on a Motorcycle or Scooter (And How to Spot It)
Before starting on the repair, it’s important to understand why short circuits happen and what signs to look for.
Knowing the causes and symptoms can make it easier to diagnose the problem and fix it confidently.
Short circuits occur when there is an unintended path for electricity to flow, often due to damaged wires, loose connections, or exposure to water.
This can lead to blown fuses, a weak or drained battery, and other electrical problems in motorcycles or scooters.
Identifying these warning signs early can help you narrow down the problem quickly and fix a short circuit on a motorcycle before it becomes more serious.
Common Causes of Short Circuits
Several common issues can lead to short circuits in motorcycles and scooters.
Understanding these causes helps with efficient motorcycle electrical troubleshooting and can prevent similar problems in the future.
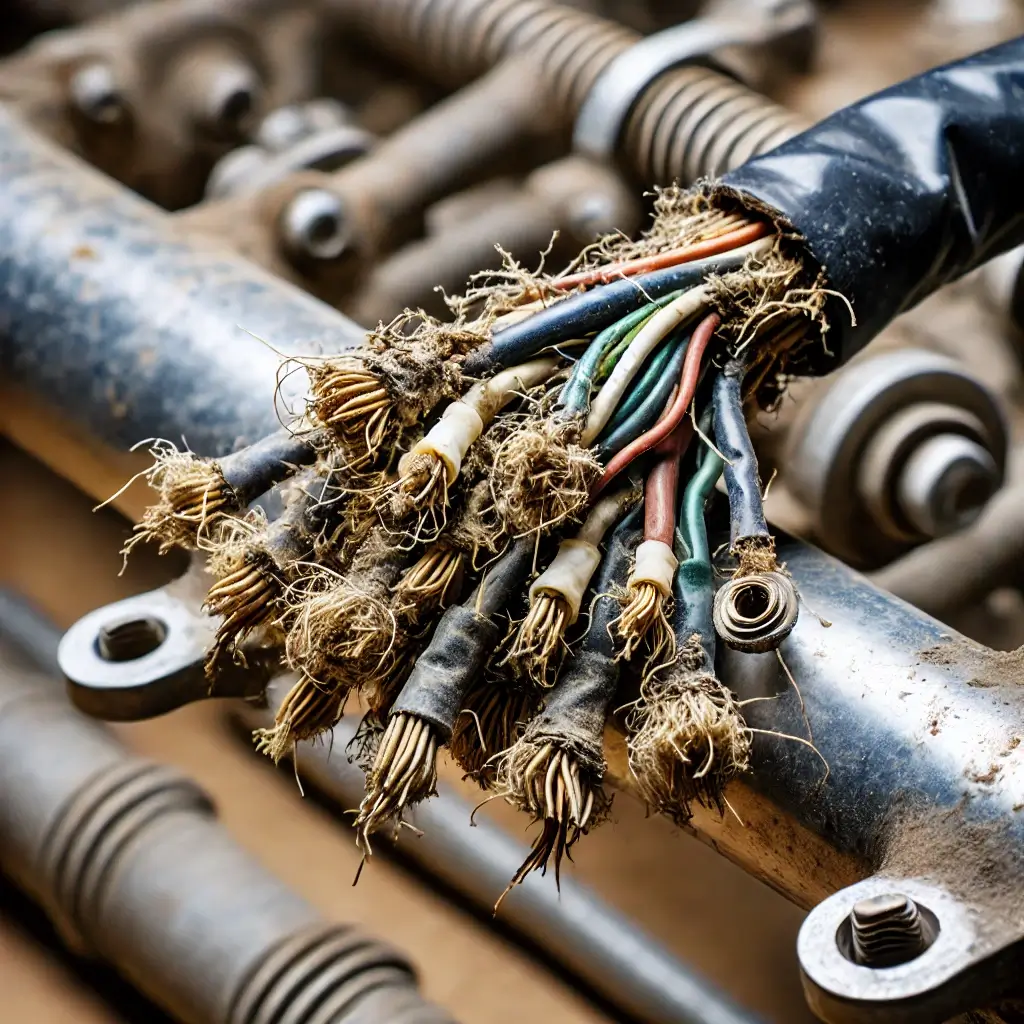
Broken or Worn-Out Wires
Over time, wires can become frayed or damaged from heat, friction, or age.
When the outer insulation wears away, the exposed metal can contact other components, allowing electricity to flow where it shouldn’t.
This often leads to blown fuses or sudden power losses.
Water Intrusion
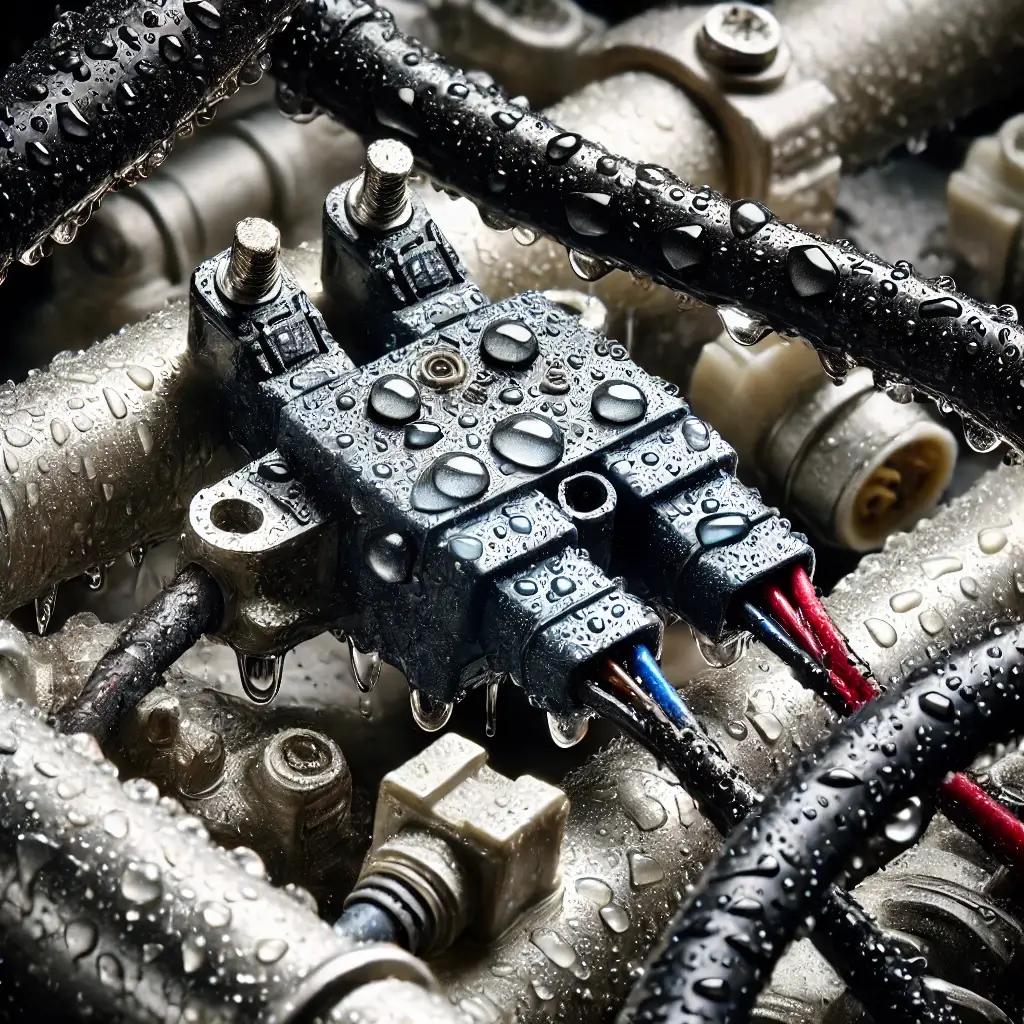
Exposure to rain, puddles, or even thorough washing can allow moisture to seep into electrical components, causing short circuits.
When water enters the wiring or connectors, it disrupts the flow of electricity and can create a direct path for current to escape, leading to potential short circuits or even damage to nearby components.
Loose or Exposed Connections
Over time, the regular vibrations from riding can shake things up—literally! Connections can start to loosen, especially around spots like the handlebars or battery.
Giving extra attention to these areas and even adjusting motorcycle steering tension can go a long way in preventing loose connections.
Those little loose points are often the culprits behind flickering lights or engine stalls—and are common triggers when you need to fix a short circuit on a motorcycle.
Corroded Connectors
Rust and corrosion build up over time, especially if your motorcycle or scooter is often exposed to wet or humid conditions.
Corroded connectors can create resistance in the circuit, forcing electricity to find an alternate path that may lead to a short circuit.
This is a common reason fuses blow and a frequent cause of other motorcycle electrical issues.
By knowing these causes, you can spot potential issues early and address them before they lead to more complex electrical problems on your motorcycle or scooter.
Faulty ECU or EFI Components
Modern motorcycles and scooters include electronic systems such as ECU (Engine Control Unit), EFI (Electronic Fuel Injection), ABS, and smart key technology.
While these systems enhance performance and functionality, they also increase the complexity of your bike’s electrical system.
A short circuit in any of these areas can cause your motorcycle to shut down unexpectedly.
For example, a frayed wire connecting to the ECU or an aftermarket security system drawing constant current can drain the battery or trip a fuse repeatedly.
If you’ve already checked the basic wiring and fuses and still face issues, it may be time to inspect or test these high-level components — especially when trying to fix a short circuit on a motorcycle with modern tech.
Signs of a Short Circuit
When a short circuit occurs in your motorcycle or scooter, it usually presents specific symptoms that can alert you to the issue.
Recognizing these signs early makes it easier to fix a short circuit on a motorcycle or scooter before it leads to bigger issues.
If you notice any of these warning signs, it’s important to fix a short circuit on a motorcycle quickly to avoid further damage to the wiring or battery.
Blown Fuses
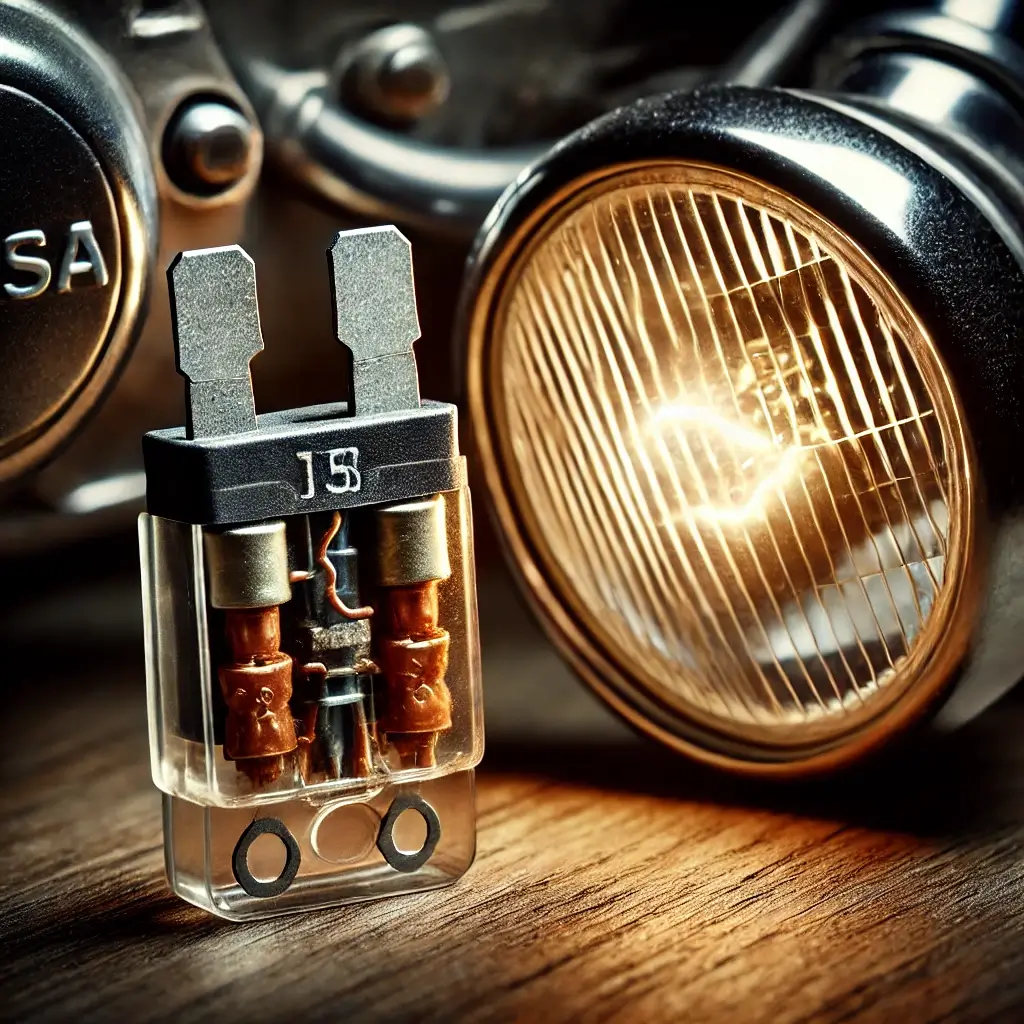
Short circuits often result in excessive current flowing through the electrical system.
To protect the circuit, fuses are designed to “blow” or break the connection when the current surpasses a safe level.
If you notice a fuse that blows repeatedly, it’s likely due to a short circuit somewhere in the wiring, which needs attention to prevent further damage.
Flickering or Dim Lights
Unstable lighting, especially headlights or indicators that flicker or appear dim, can indicate a short circuit in the wiring.
This happens when the current flow is disrupted or redirected due to exposed or damaged wires.
Flickering lights are often an early warning, so spotting this sign can help you take quick action.
Battery Drains Quickly
When a short circuit causes continuous current flow, it drains the battery faster than usual.
If you notice that your battery struggles to hold a charge or runs out unexpectedly, it may be due to a short circuit causing a constant power draw even when the bike is off.
This is particularly noticeable if your battery drains quickly after recharging or replacing it.
Sudden Loss of Power or Stalling
A short circuit can disrupt the main power flow, leading to sudden power loss or even stalling while riding.
This happens because the electrical system is unable to consistently supply power to the engine or other components.
If your motorcycle stalls or loses power unexpectedly, it could be a sign that a short circuit is interfering with the proper electrical flow.
These signs are key indicators that there may be a short circuit in your motorcycle or scooter’s wiring.
By recognizing and addressing them early, you can troubleshoot effectively and prevent more extensive damage to your electrical system.
Safety Tips Before Starting
Working with electrical components requires caution to avoid shocks or accidental damage—especially when you’re trying to fix a short circuit on a motorcycle yourself.
Follow these essential safety tips for effective DIY motorcycle wiring repair.
If you’ve tackled projects like Custom Motorcycle Seats with Gel Cushions before, you know how important it is to stay safe and prepared.
- Disconnect the battery – Always disconnect the battery before starting repairs to prevent shocks and avoid further electrical issues.
- Wear gloves and work in a dry area – Gloves protect your hands, while a dry workspace minimizes the risk of shocks.
- Avoid rushing – Follow each step carefully, making sure connections are secure and properly insulated.
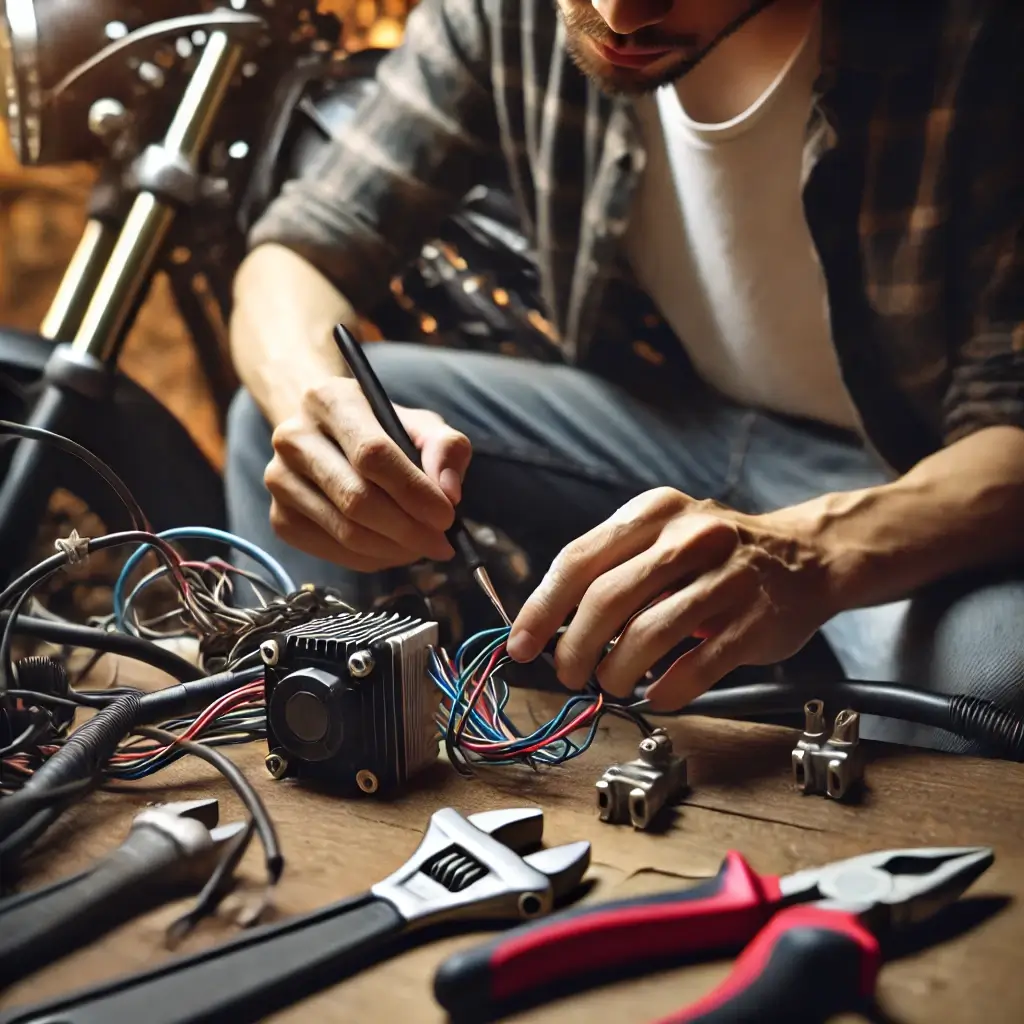
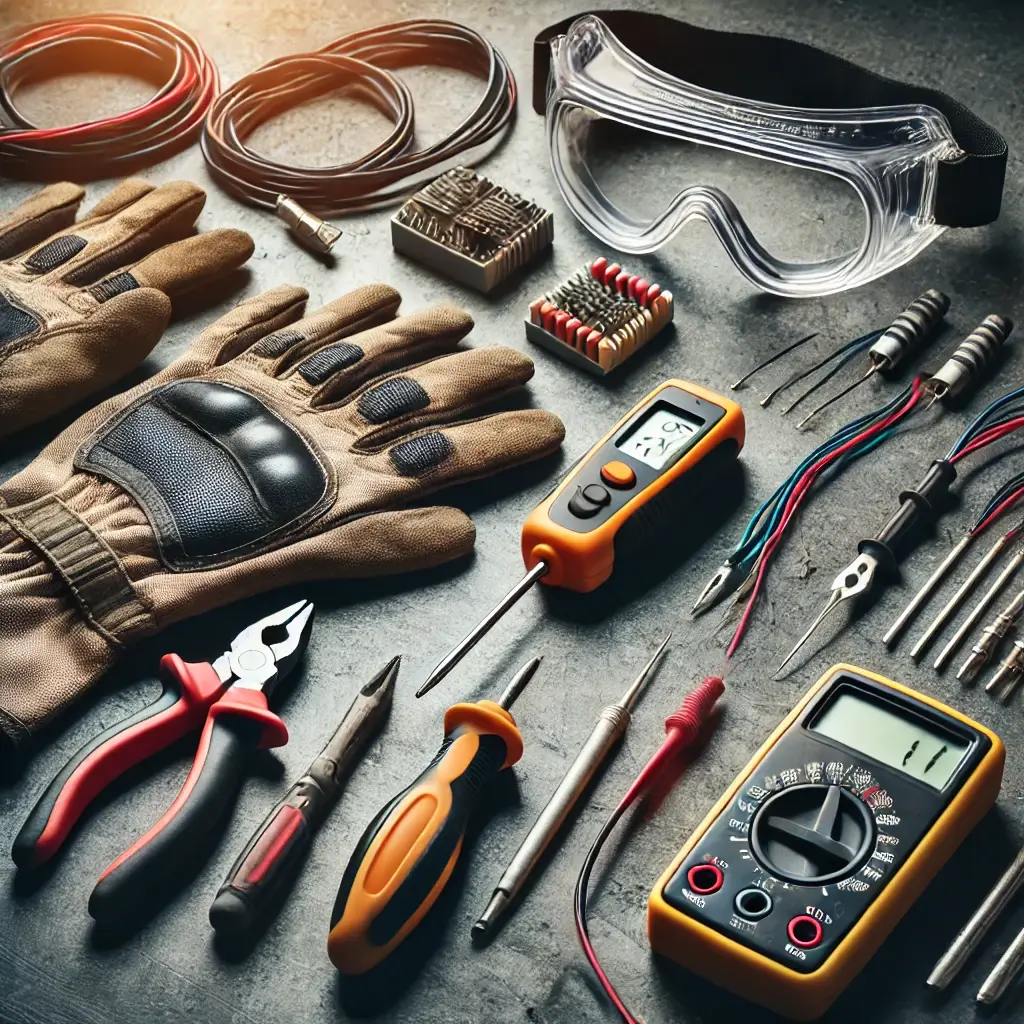
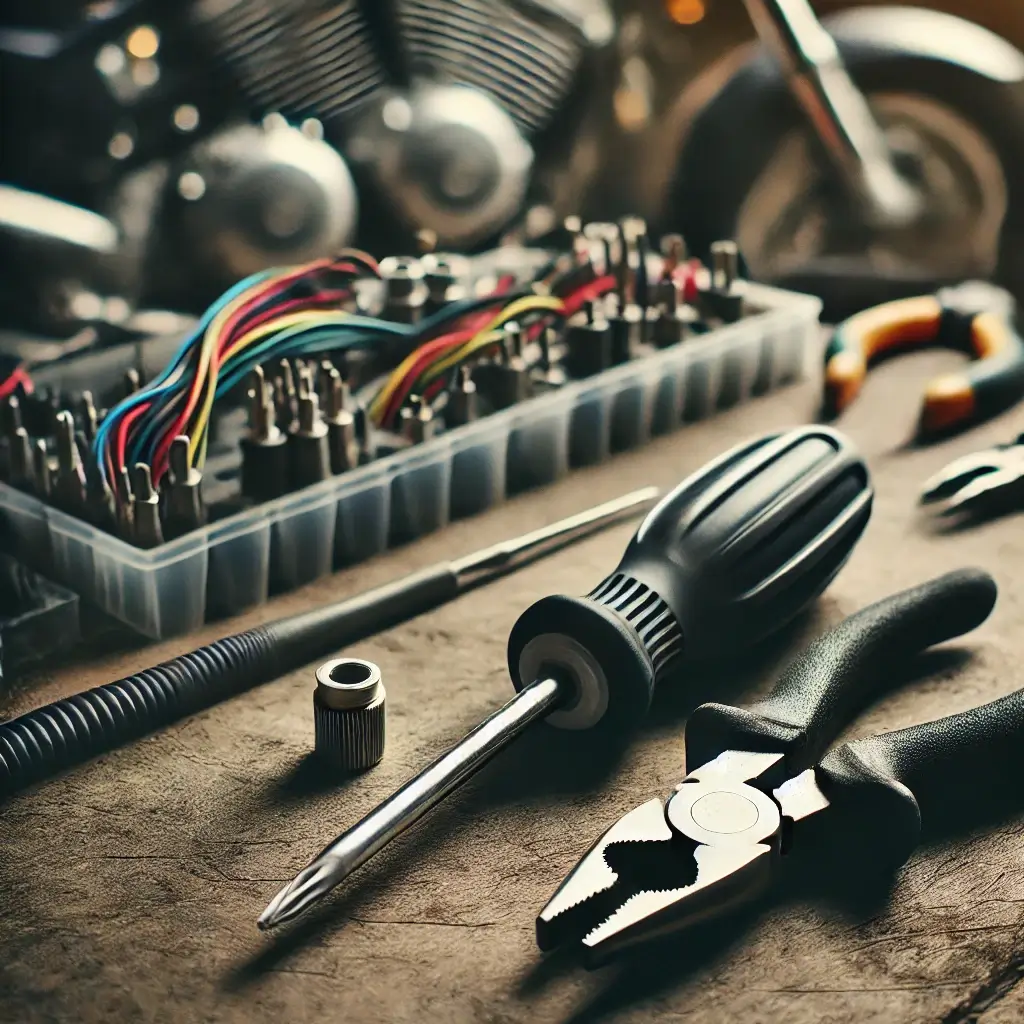
Tools and Items You’ll Need
Having the right tools can make diagnosing and fixing a short circuit much easier and less stressful. Here’s a list of essential items you’ll need to get the job done smoothly:
To successfully fix a short circuit on a motorcycle, having the right diagnostic tools is essential.
Multimeter
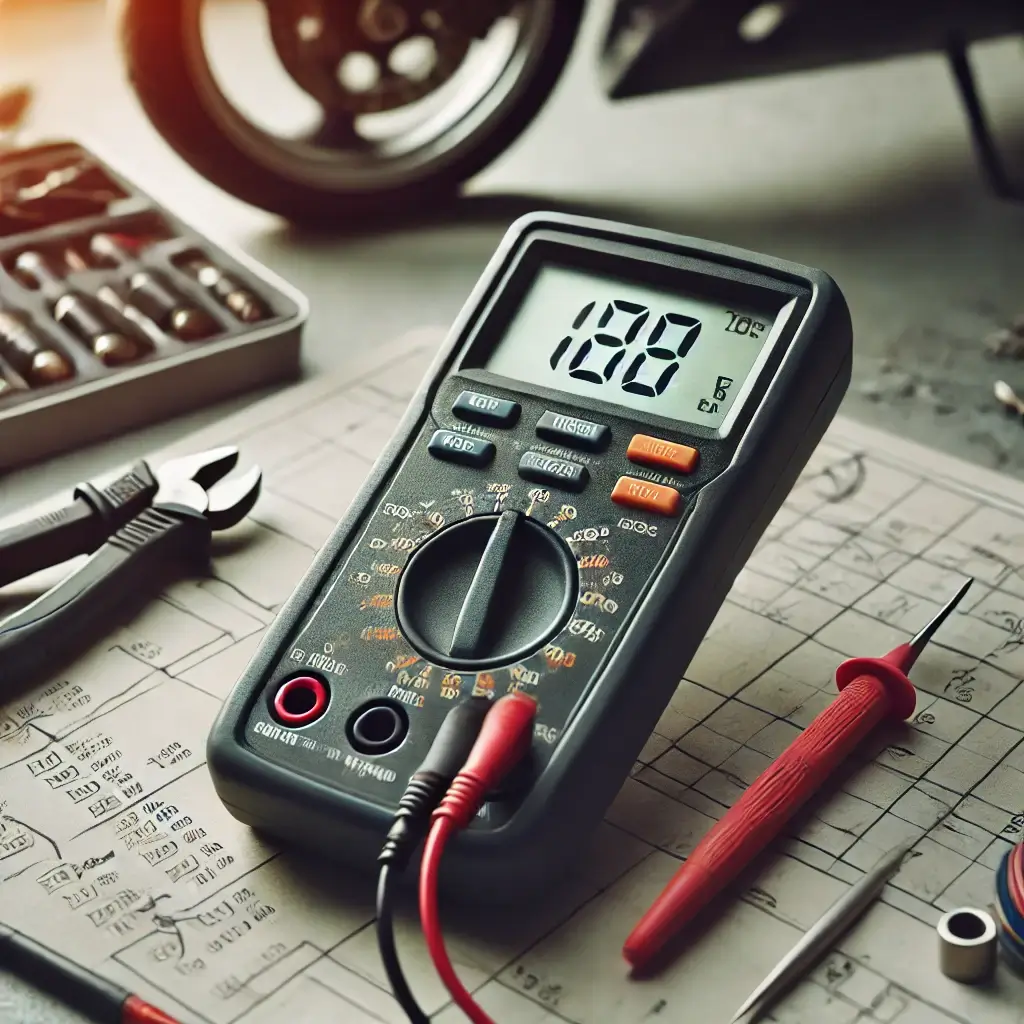
This tool is crucial for checking voltage and continuity in your wires.
A multimeter allows you to see where the electricity is flowing (or not flowing) and helps you fix a short circuit on a motorcycle with precision.
It’s easy to use and a must-have for anyone working with motorcycle or scooter wiring.
Wire Cutters and Electrical Tape
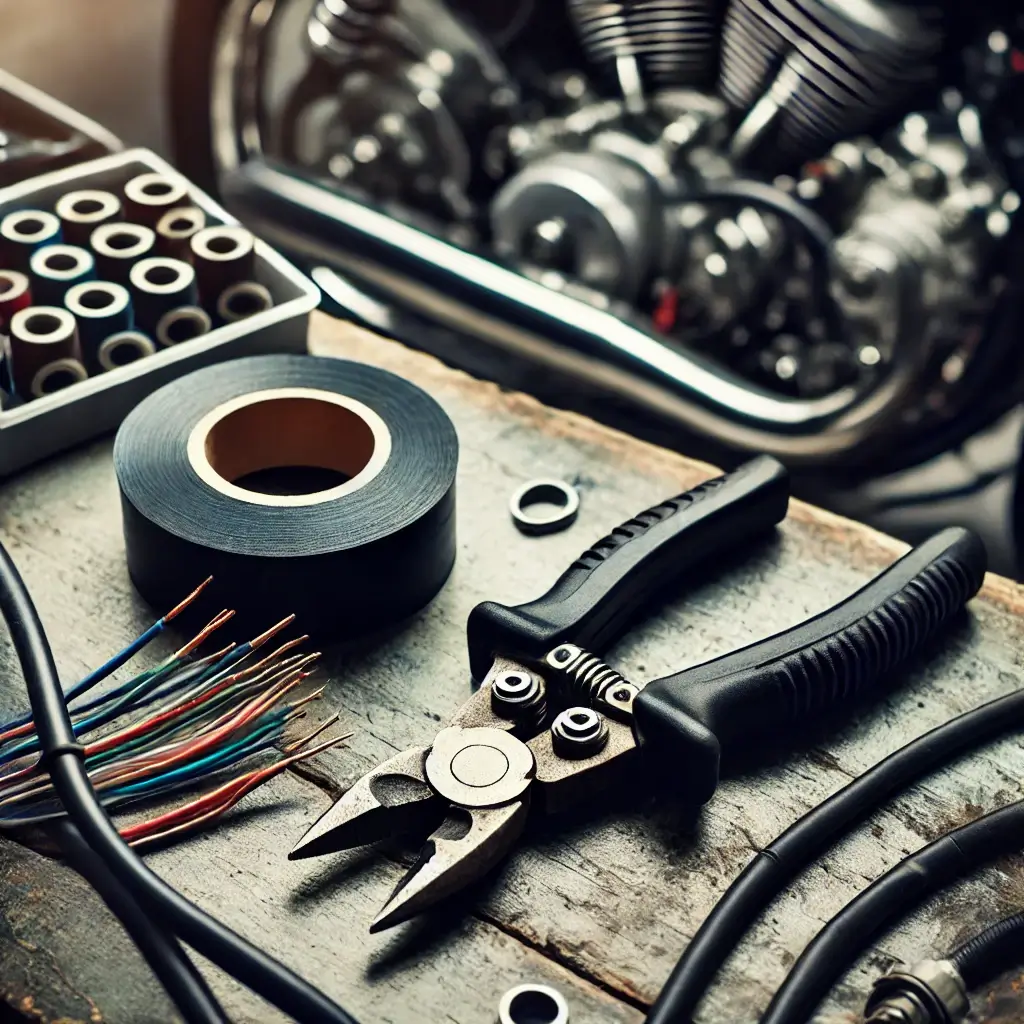
You’ll need wire cutters to trim damaged wires or remove sections that are causing the short.
Electrical tape is essential for insulating the repaired sections, keeping them safe from further damage and preventing future shorts.
If you want a more secure option, heat shrink tubing is a great alternative to electrical tape.
Circuit Tester

A circuit tester can help identify live wires and ensure the circuits are functioning as they should.
This is especially handy for testing connections and pinpointing issues quickly without a full diagnostic.
Wiring Diagram
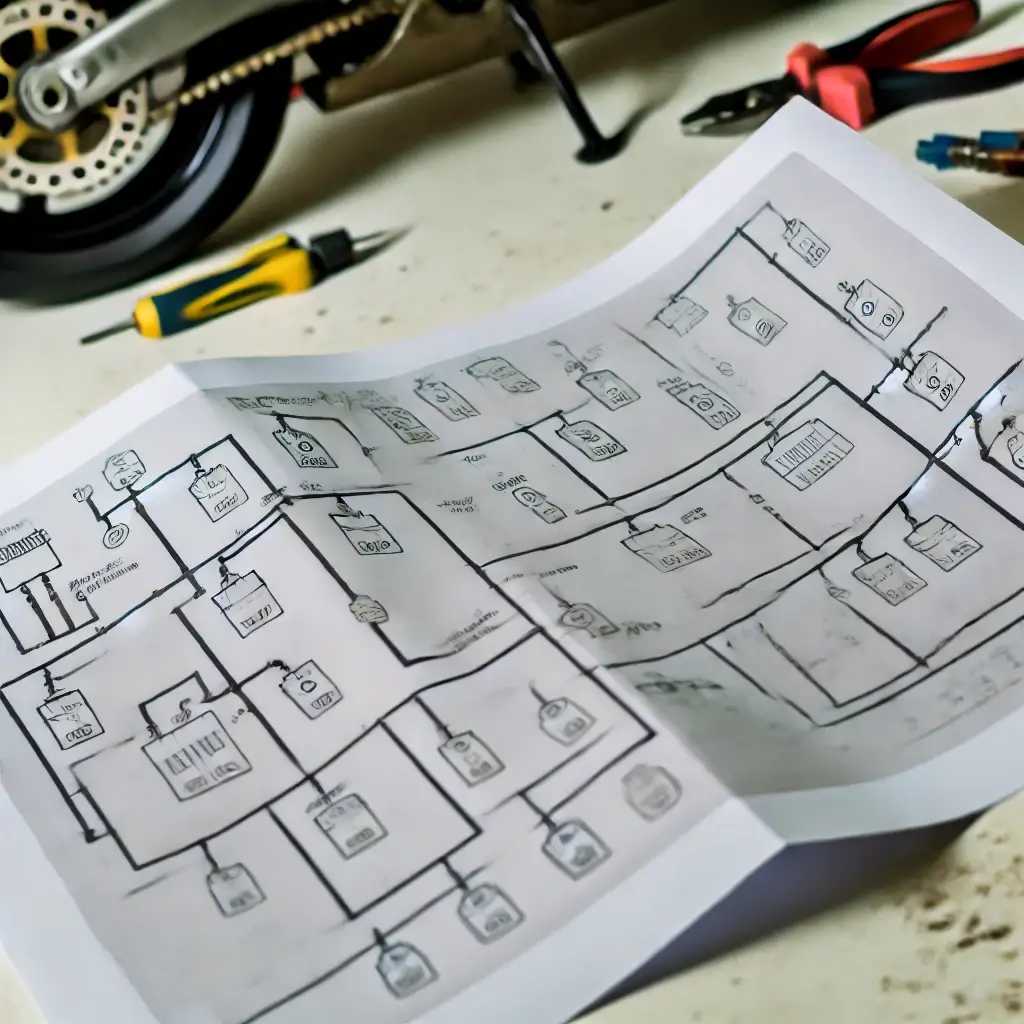
A wiring diagram for your specific motorcycle or scooter model can be extremely helpful.
It gives you a visual layout of the electrical system, making it easier to trace wires and locate possible faults.
Many wiring diagrams are available in your bike’s service manual or online.
Screwdriver and Pliers
Often, you’ll need a screwdriver to access panels or connectors, and pliers can be useful for gripping small wires and making adjustments as you work on the electrical components.
With these tools on hand, you’ll be well-prepared to fix a short circuit on a motorcycle or scooter safely and efficiently, even if you’re not a professional mechanic.
Step-by-Step Guide to Fix a Short Circuit on a Motorcycle or Scooter (7 Steps)
Step 1: Prepare Your Workspace and Safety Gear
Before you begin any electrical repair, it’s crucial to ensure you’re working in a safe environment.
Park your motorcycle on a level surface and make sure the engine is off and completely cool.
Disconnect the battery to eliminate the risk of electrical shock or accidental shorting.
Wear insulated gloves to protect your hands, and gather all necessary tools including a multimeter, test bulb, electrical tape, wire cutters, and heat shrink tubing.
A dry, well-lit workspace will make the process much easier and safer.
Step 2: Find the Problem Area
Start by inspecting your motorcycle’s wiring system. Use a multimeter set to continuity mode to test various wire paths.
This helps you find breaks or unintended connections.
Look closely for physical signs such as frayed wires, burn marks, melted insulation, or the smell of burnt plastic.
These visual cues often indicate the exact location of the short.
Pay special attention to areas where the wires might rub against the frame or engine components, as vibration and heat often lead to damage.
Step 3: Isolate the Faulty Circuit
After locating the problem area, the next step is to isolate that specific circuit to prevent further issues.
Trace the wire from the damaged point back to the battery or fuse box, and disconnect any accessories like aftermarket lights or horns that are connected to the same circuit.
This helps you determine whether the short is caused by a single wire or part of a larger harness issue.
Label the disconnected parts if needed, so you can reassemble them easily later.
Step 4: Use a Bulb to Confirm the Short
Sometimes, a multimeter may not detect intermittent or minor faults.
That’s where a test bulb comes in handy.
Take a small 12V test bulb with two wires, and connect it to the terminals of the fuse that keeps blowing.
Turn the ignition key on. If the bulb lights up, it confirms a short circuit in the system.
You can then unplug connectors or remove wires one by one until the bulb turns off, helping you pinpoint the exact wire causing the issue.
This technique is simple, budget-friendly, and effective.
Step 5: Repair or Replace Damaged Wires
Once you’ve identified the damaged wire, it’s time to repair it properly.
Cut out the faulty section using wire cutters, then splice in a new piece of wire with the same gauge and insulation.
Use crimp connectors or solder the joints for a secure connection.
Always insulate the repaired area with electrical tape or, even better, heat shrink tubing.
This not only prevents future shorts but also protects the joint from moisture, dirt, and vibration damage.
Take your time—sloppy repairs often lead to recurring issues.
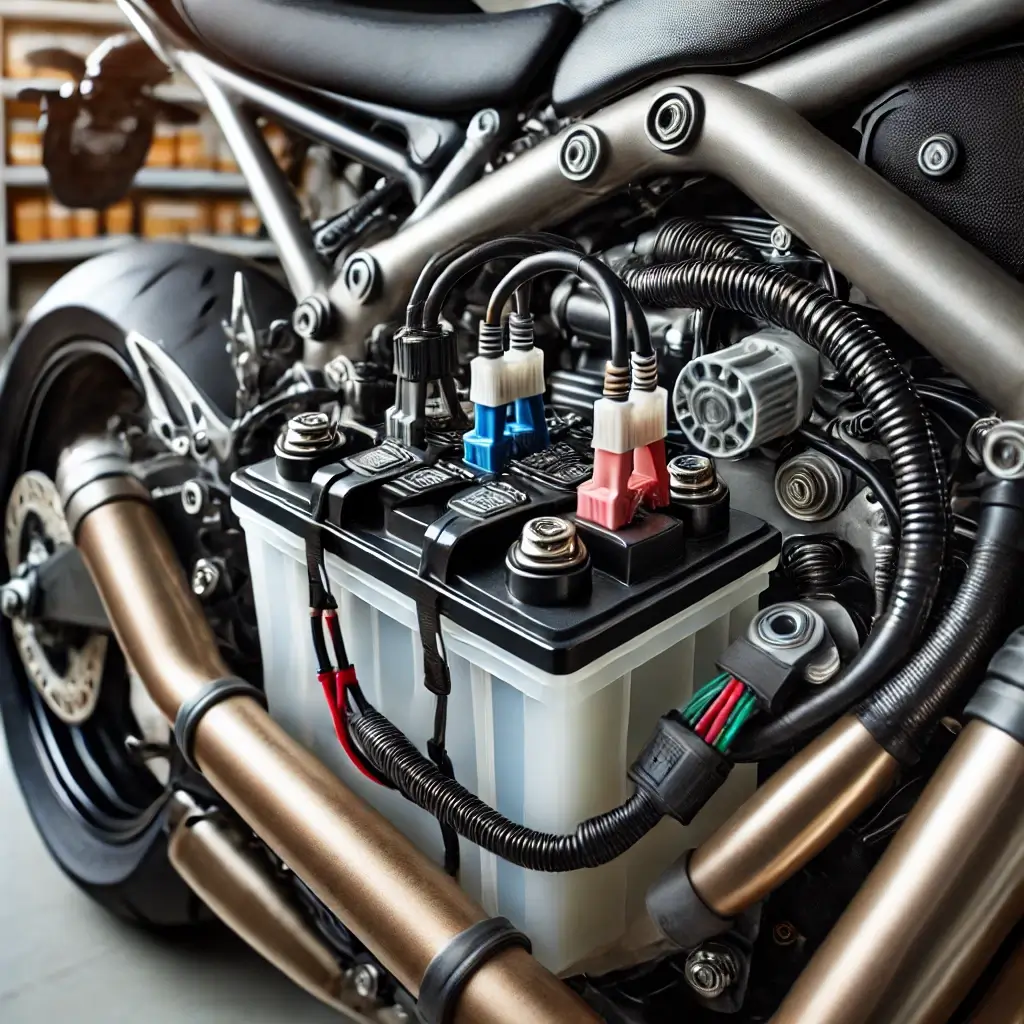
Step 6: Secure and Protect the Wiring
Now that your wiring is repaired, make sure it stays safe.
Use zip ties or wire clips to secure the wires away from hot surfaces like the engine or exhaust.
Tuck loose wires into protective sleeves or along the bike’s frame where they won’t move or rub.
Apply dielectric grease to all open connectors to protect them from corrosion, especially if you ride in wet or humid conditions.
A neat, well-secured wiring layout not only prevents future shorts but also makes future maintenance easier.
Step 7: Test the Fix Thoroughly
Reconnect the battery and start testing all electrical components—lights, indicators, horn, ignition system.
Let the motorcycle idle for a few minutes and monitor for any flickering lights or electrical failure.
Test the brake lights, high beam, and turn signals.
If everything works without issues and the fuse no longer blows, your repair is successful.
Consider taking a short test ride to confirm everything performs well under vibration and load.
If you still experience problems, recheck your wiring and connections carefully.
Tips to Prevent Future Short Circuits
Regular maintenance of electrical components can prevent short circuits and extend the lifespan of your motorcycle or scooter.
Use this practical checklist to keep your wiring system safe and reliable:
- Inspect Wiring Regularly – Look for signs of wear, fraying, or exposed wires. Focus on high-vibration zones like under the seat, near the handlebars, and around the battery.
- Use Dielectric Grease on Terminals – Applying dielectric grease to connectors helps protect them from moisture, corrosion, and shorts.
- Keep Electrical Parts Dry – Avoid washing your motorcycle directly over connectors or exposed wires. Use compressed air to remove trapped water.
- Avoid Overloading the Electrical System – Don’t add high-power accessories like extra lights or horns without checking if your system can handle it. Always use relays and fuse protection.
- Replace Fuses with the Correct Rating – Never use higher-amp fuses than recommended. It may prevent a fuse from blowing when it should, increasing fire risk.
- Install a Fuse Box (if missing) – A fuse box allows better distribution of circuits and helps isolate issues when one circuit fails.
- Secure and Clean Connectors – Loose connectors create arcing, which can lead to shorts. Clean them with electrical contact cleaner and keep them tight.
- Avoid DIY Hacks with Poor Wiring – Twisting wires together and wrapping with tape may work temporarily, but it’s not reliable. Always solder and insulate properly or use crimp connectors.
- Use High-Quality Insulation – Electrical tape is useful, but heat shrink tubing provides stronger, longer-lasting protection.
- Store the Bike Properly – Use a waterproof cover and park in a dry space to prevent moisture buildup and corrosion in the electrical system.
- Schedule Professional Electrical Inspections – Even if everything seems fine, a mechanic can spot hidden faults and help you avoid complex repairs later.
Preventing electrical faults early makes it easier to avoid repeated breakdowns — and ensures you don’t need to fix a short circuit on a motorcycle again and again.
When to Get Help from a Mechanic to Fix a Short Circuit on a Motorcycle/Scooter
While you can often fix a short circuit on a motorcycle by following a step-by-step approach, there are times when professional help is the safer option.
Some motorcycle electrical issues require more advanced expertise.
Here’s when it might be best to consult a professional:
- Complex or recurring issues – If the short circuit is difficult to trace or keeps happening, it may be a deeper problem that needs professional motorcycle wiring repair.
- Limited electrical knowledge – If you’re unsure about safely handling the repair, a mechanic can provide accurate diagnosis and repair.
Conclusion
With this guide, you’re all set to confidently tackle short circuit issues in your motorcycle or scooter, ensuring a smoother, safer ride.
With proper knowledge about scooter short circuit fixing, you’ll stay prepared, avoid unexpected electrical breakdowns, and keep your motorcycle’s wiring system in top shape.
As long as you follow each step carefully and use the right tools, you can repair electrical faults on your own—without needing a mechanic for every issue.
Whether you ride daily or just on weekends, learning how to fix a short circuit on a motorcycle gives you the confidence to handle unexpected electrical problems and keep your bike running smoothly.